Cora the Candy Corn Pal: Free Halloween Crochet Pattern
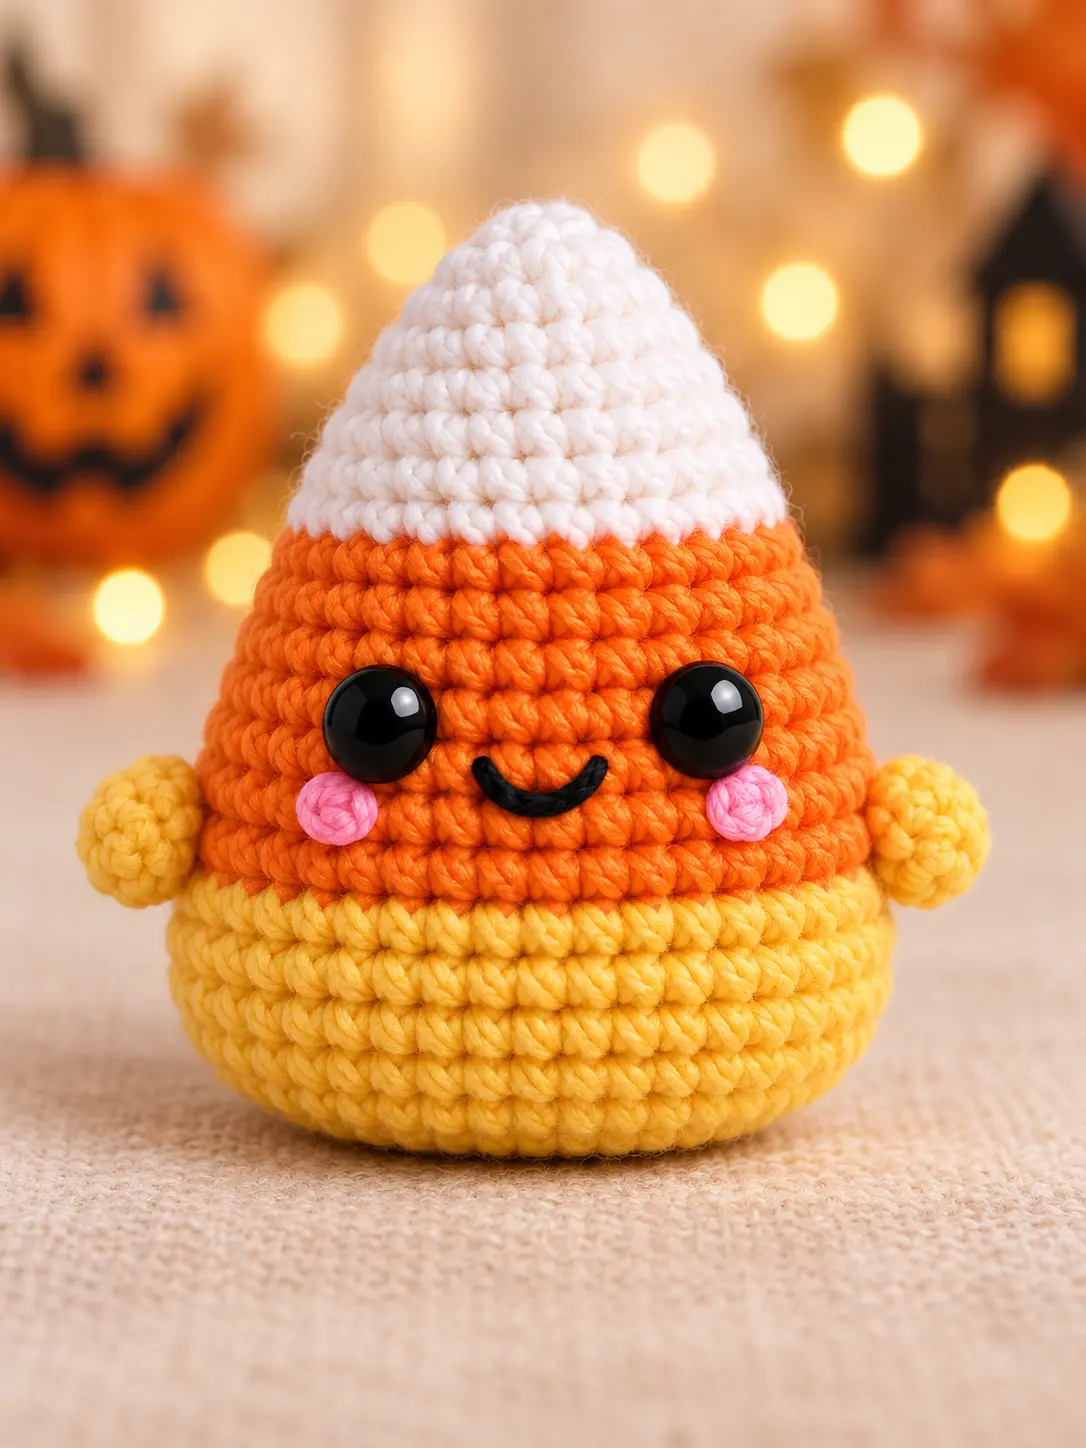
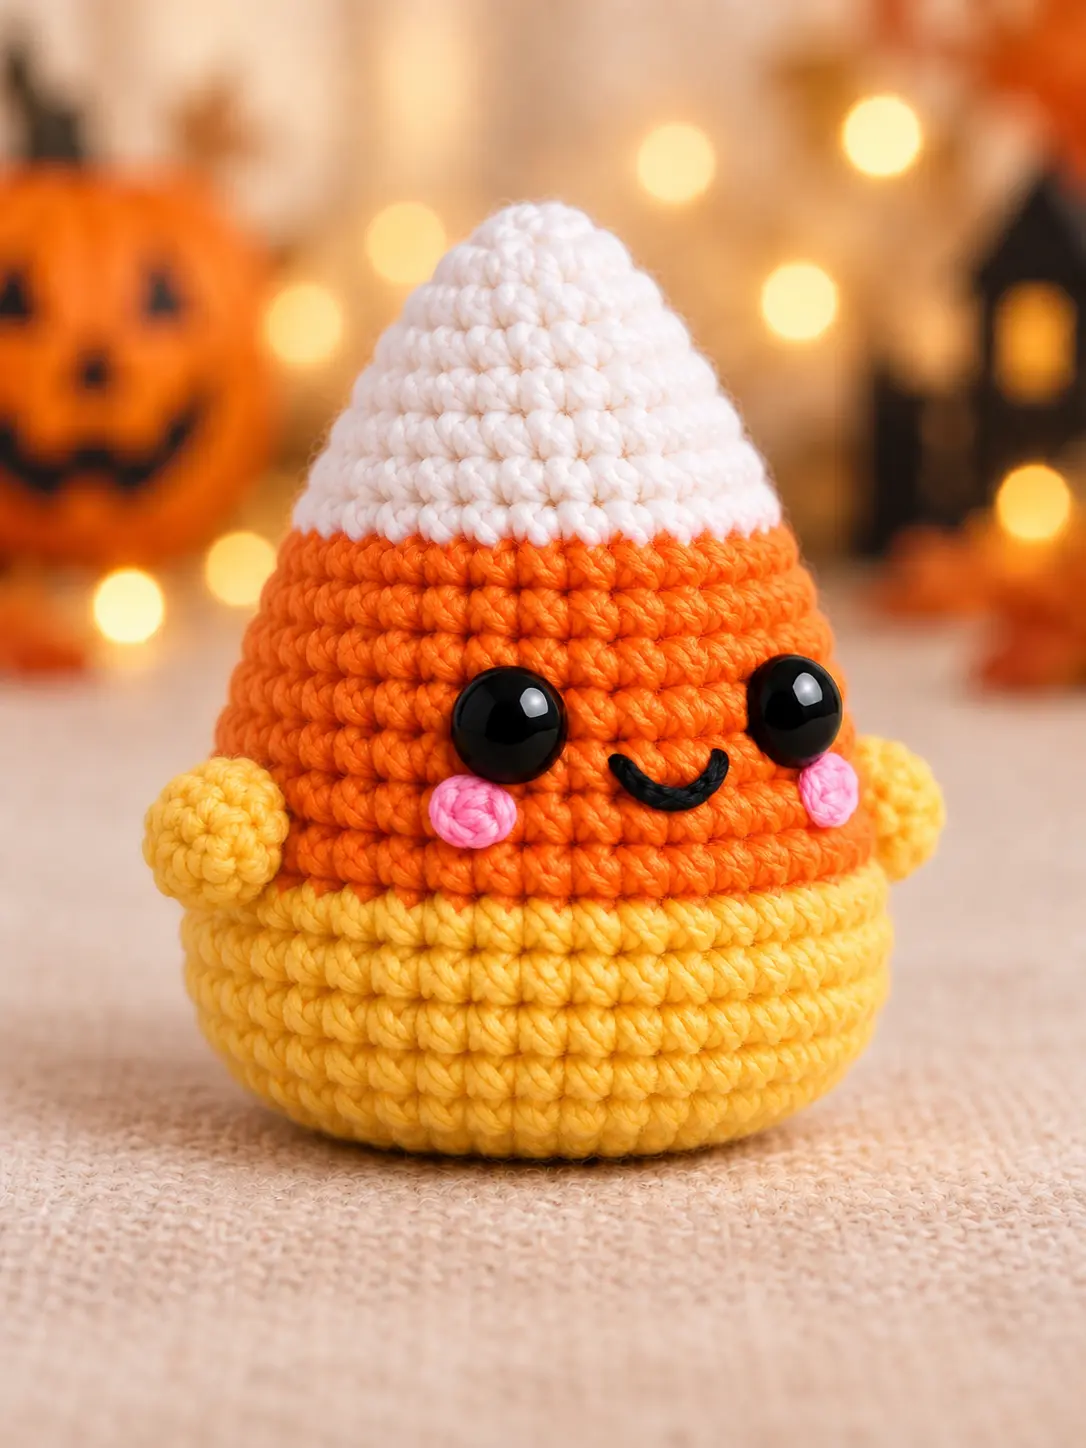
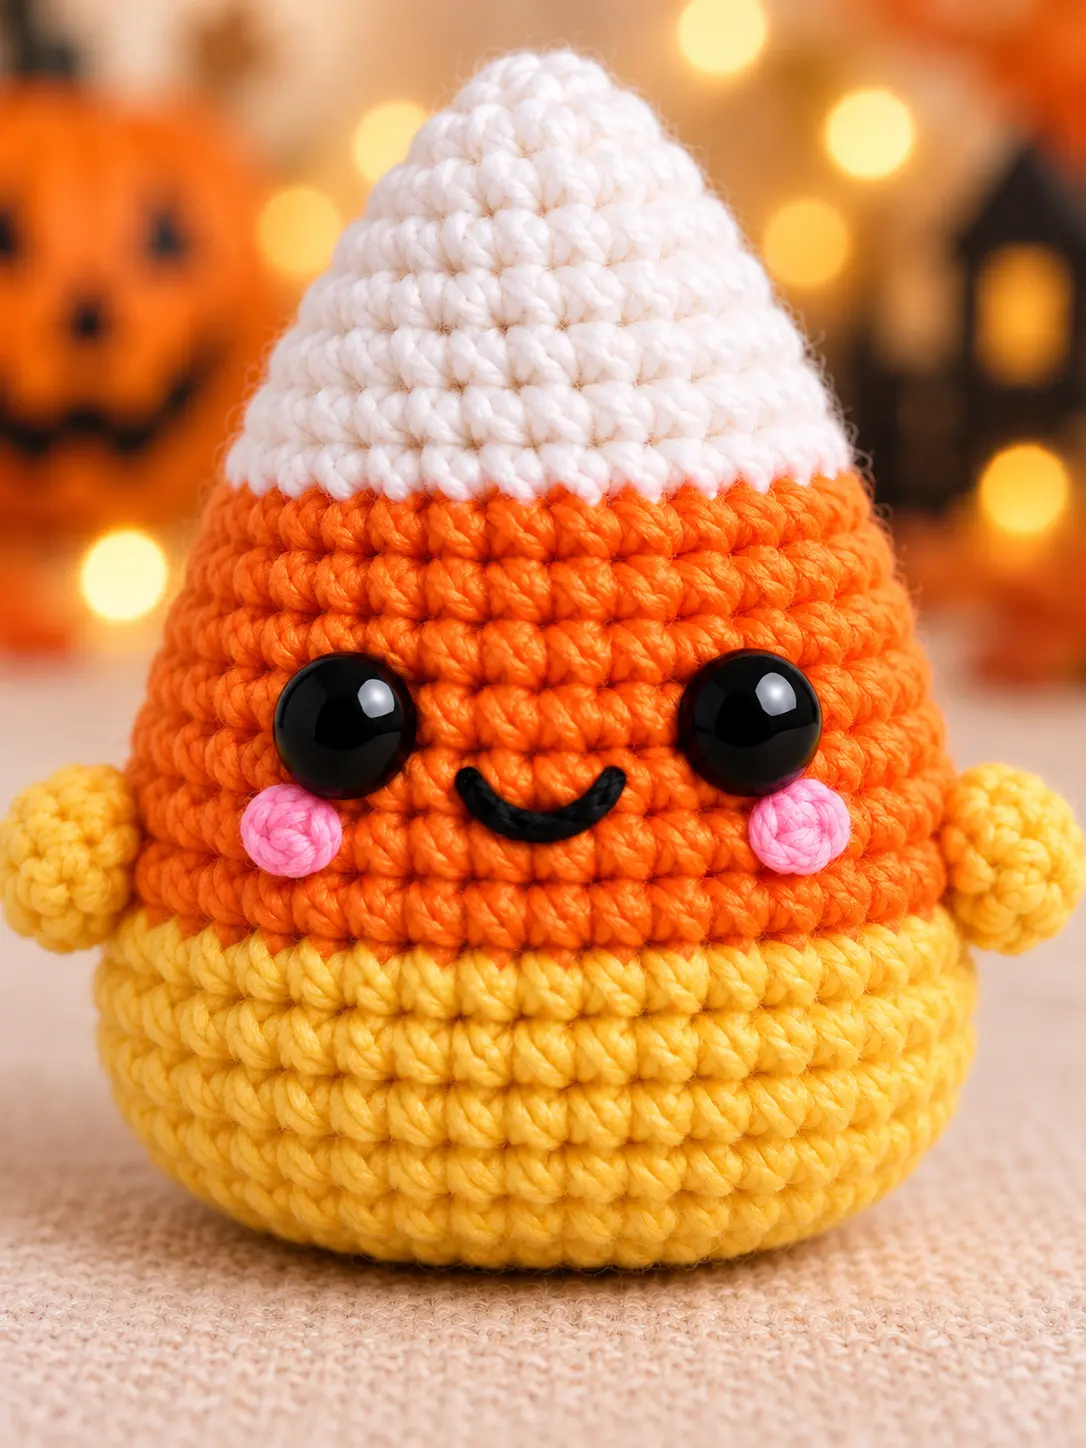
Cora is a small candy corn amigurumi with a soft white point, a bright orange middle, a rounded yellow base, and two tiny waving arms. Her shiny black eyes, curved smile, and pink spiral cheeks turn a classic Halloween treat into a friendly handmade decoration.
This free candy corn crochet pattern is worked from the top down as one continuous body. The color changes are built into the main piece, so there are no separate white, orange, or yellow sections to sew together. Only the arms and cheeks need to be attached.
The instructions below were rebuilt to match the finished crochet shown in the photos. The original graphic changes stitch counts too sharply and does not create the same full cone shape. This version grows evenly to 30 stitches, keeps the orange section wide enough for the face, and closes the yellow base with complete decrease rounds.
About This Candy Corn Crochet Pattern
Cora is a simple Halloween project for crocheters who know the basic amigurumi stitches. The body uses single crochet, increases, and invisible decreases. Slow color changes and careful counting create the clear candy corn stripes.
The finished toy works well on a shelf, desk, mantel, tiered tray, party table, or autumn display. It is also small enough to use as a handmade gift, market item, or Halloween ornament when a hanging loop is added.
Skill Level
Easy to confident beginner. You should know how to make a magic ring, work in continuous rounds, increase, make an invisible decrease, change yarn colors, and sew small pieces onto an amigurumi body.
Finished Size
Approximately 9 cm (3.5 inches) tall when made with DK or light worsted yarn and a 2.5 mm crochet hook. Your finished size may be a little different because of yarn thickness, hook size, tension, and stuffing.
Materials
- White DK or light worsted yarn for the pointed top
- Orange DK or light worsted yarn for the middle
- Yellow DK or light worsted yarn for the base and arms
- Small amount of pink yarn for the cheeks
- Black embroidery thread or thin black yarn for the smile
- Two 10 mm black safety eyes
- 2.5 mm crochet hook
- Polyester fiberfill
- Yarn needle
- Stitch marker
- Scissors
- Sewing pins, optional
Abbreviations
This pattern uses US crochet terms.
- dec: invisible single crochet decrease
- FO: fasten off
- inc: 2 single crochet stitches in one stitch
- MR: magic ring
- rnd: round
- sc: single crochet
- sl st: slip stitch
- st/sts: stitch/stitches
Pattern Notes
- Work the body and arms in continuous spiral rounds. Do not join unless the instructions say to join.
- Place a stitch marker in the first stitch of every round and move it up as you work.
- The number in parentheses at the end of a round is the total stitch count.
- Repeat instructions inside parentheses the stated number of times.
- Use invisible decreases for a smooth yellow base.
- Keep the white, orange, and yellow yarns close in thickness so the body stays even.
- Stuff with several small pieces of fiberfill to keep the cone smooth.
How to Make a Neat Color Change
Begin the last single crochet of the old color, but stop before the final yarn over. Place the new color over the hook and pull it through the final two loops. Continue the next round with the new color.
Tie the two yarn tails together loosely inside the body. Do not pull the knot hard because it may make the color line dip inward. Cut the old color after the knot is secure.
How to Make an Invisible Decrease
Insert the hook through the front loop of the next stitch. Then insert it through the front loop of the following stitch. Yarn over and pull through the first two loops. Yarn over again and pull through the remaining two loops.
1. Candy Corn Body
Begin at the top with white yarn.
- Rnd 1: Make 6 sc in a MR. (6)
- Rnd 2: (1 sc, inc) × 3. (9)
- Rnd 3: Sc in every stitch around. (9)
- Rnd 4: (2 sc, inc) × 3. (12)
- Rnd 5: (3 sc, inc) × 3. (15)
- Rnd 6: (4 sc, inc) × 3. (18)
- Rnd 7: (5 sc, inc) × 3. (21)
- Rnd 8: (6 sc, inc) × 3. (24)
Change to orange yarn on the final pull-through of Round 8.
- Rnd 9: (7 sc, inc) × 3. (27)
- Rnd 10: (8 sc, inc) × 3. (30)
- Rnds 11–15: Sc in every stitch around. (30)
Place the safety eyes between Rounds 12 and 13. Leave eight visible stitches between the eyes. Check the face from the front before adding the safety backs.
Change to yellow yarn on the final pull-through of Round 15.
- Rnds 16–18: Sc in every stitch around. (30)
- Rnd 19: (3 sc, dec) × 6. (24)
- Rnd 20: Sc in every stitch around. (24)
- Rnd 21: (2 sc, dec) × 6. (18)
Begin stuffing the body. Fill the pointed top first with tiny pieces of fiberfill. Add more stuffing to the orange middle and yellow base, but do not stretch the stitches.
- Rnd 22: (1 sc, dec) × 6. (12)
- Rnd 23: Dec around. (6)
Finish stuffing. Cut the yarn and leave a tail. Thread the tail through the front loops of the final six stitches, pull the opening closed, and hide the end inside the body.
2. Rounded Arms — Make 2
Use yellow yarn.
- Rnd 1: Make 6 sc in a MR. (6)
- Rnd 2: Inc in every stitch around. (12)
- Rnd 3: Sc in every stitch around. (12)
- Rnd 4: (1 sc, dec) × 4. (8)
Add a very small pinch of stuffing to the round end. Flatten the opening and make 4 sc through both layers. Fasten off and leave a long tail for sewing.
3. Pink Cheeks — Make 2
Use pink yarn.
- Rnd 1: Make 6 sc in a MR. Join to the first stitch with a sl st. (6)
Fasten off and leave a sewing tail. Keep the little circles flat. The center of the magic ring creates the spiral look seen in the photos.
4. Embroidered Smile
Use black embroidery thread or thin black yarn. Place a small curved smile between the eyes and about one round lower. Make one short stitch for each side of the curve, then add a tiny holding stitch at the center to keep the smile rounded.
Do not pull the embroidery too tightly. A tight smile can press a dent into the orange section.
Assembly
- Shape the stuffed body into a soft candy corn cone. Keep the white top centered and the yellow base flat.
- Pin one yellow arm to each side over Rounds 15–17, close to the orange-to-yellow color change.
- Angle both arms slightly upward. Check the front view before sewing.
- Sew through the flat edge of each arm and the body with small firm stitches.
- Place one pink cheek below and slightly outside each eye.
- Sew around the outside of each cheek. Keep the circles flat against the orange section.
- Hide every yarn tail inside the body and shape the toy gently with your hands.
Stitch-Count Check
The white top begins with 6 stitches and grows in complete three-part increase rounds: 6, 9, 12, 15, 18, 21, and 24. The first two orange rounds continue the same shape to 27 and then 30 stitches. This makes a smooth cone without a sudden wide step at the first color change.
The body stays at 30 stitches through the widest orange and yellow rounds. The base then decreases evenly from 30 to 24, stays at 24 for one shaping round, and closes through 18, 12, and 6 stitches. Each arm grows from 6 to 12, decreases to 8, and closes with four stitches through two flat layers.
Helpful Tips for the Best Shape
Keep the Color Lines Level
Do not tighten the first stitch of a new color too much. After working several stitches, pull the yarn tail gently until the change looks neat.
Use Small Pieces of Stuffing
A large piece of fiberfill can leave the top empty and make the lower body lumpy. Add small pieces and push them into place with the back of your hook or a blunt tool.
Do Not Overstuff the Point
The white top should feel firm, but it should still bend slightly. Too much stuffing can stretch the magic ring and make the point look flat.
Check the Face Before Locking the Eyes
Place both eyes, set the body on a table, and look at it from the front. Move either eye if the face looks tilted. Attach the safety backs only after the placement feels balanced.
Make the Base Flat
Use a little less stuffing in the final two rounds. After closing, press the center of the base slightly upward so the yellow section rests evenly on the table.
Ways to Customize Your Candy Corn Pal
- Use cream, burnt orange, and mustard yarn for a softer farmhouse look.
- Replace the pink cheeks with small embroidered blush lines.
- Add a tiny black bow to one side of the white point.
- Make a hanging loop at the top for a Halloween ornament.
- Use thinner yarn and a smaller hook for a keychain-sized candy corn.
- Use blanket yarn and a larger hook for a soft plush version.
- Embroider closed eyes for a sleepy expression.
Frequently Asked Questions
Is this pattern beginner friendly?
Yes. The body uses basic amigurumi stitches and simple color changes. The most important steps are counting each round and keeping the color lines even.
Why does my candy corn lean to one side?
A missed increase can move the widest part away from the center. Check the count after every shaping round. Uneven stuffing can also make the top lean.
Why is the color change uneven?
Spiral rounds naturally create a small step. Use the neat color-change method above and place the step at the back. You can also make a standing single crochet in the new color if you prefer a softer join.
Can I make the arms without stuffing?
Yes. Unstuffed arms will look flatter. A tiny amount of stuffing gives them the round puffed shape shown in the photos.
Can I embroider the eyes?
Yes. Secure black embroidery is a better option when the finished candy corn will be handled by a young child.
Can I use thicker yarn?
Yes. Use a hook that creates a firm fabric without gaps. Thicker yarn will make a larger toy and will need more stuffing.
Care and Safety
Cora is designed as a small decorative Halloween collectible. Plastic safety eyes and sewn pieces may become choking hazards. Keep the finished toy away from children under three and pets, or replace the eyes with secure embroidery.
Spot-clean with cool water and mild soap. Press out extra water with a towel and let the toy dry flat. Reshape the white point, arms, and yellow base while the yarn is still damp. Keep yarn decorations away from candles, heaters, hot bulbs, and open flames.
Your Candy Corn Pal Is Finished
Give the white point one final shape, lift both little arms, and smooth the round yellow base. Cora is ready to bring a bright handmade smile to your Halloween decorations.
SEO Details
SEO title: Cora Candy Corn Pal Free Crochet Pattern
Meta description: Crochet Cora, a friendly candy corn pal with a white point, orange middle, yellow base, pink cheeks, and tiny arms. Includes a complete free pattern.
Suggested URL slug: cora-candy-corn-pal-free-crochet-pattern
Main keyword: candy corn crochet pattern
Related keywords: Halloween candy corn amigurumi, easy candy corn crochet, mini Halloween amigurumi, free Halloween crochet pattern