Mallow the Little Ghost Buddy: Free Halloween Crochet Pattern
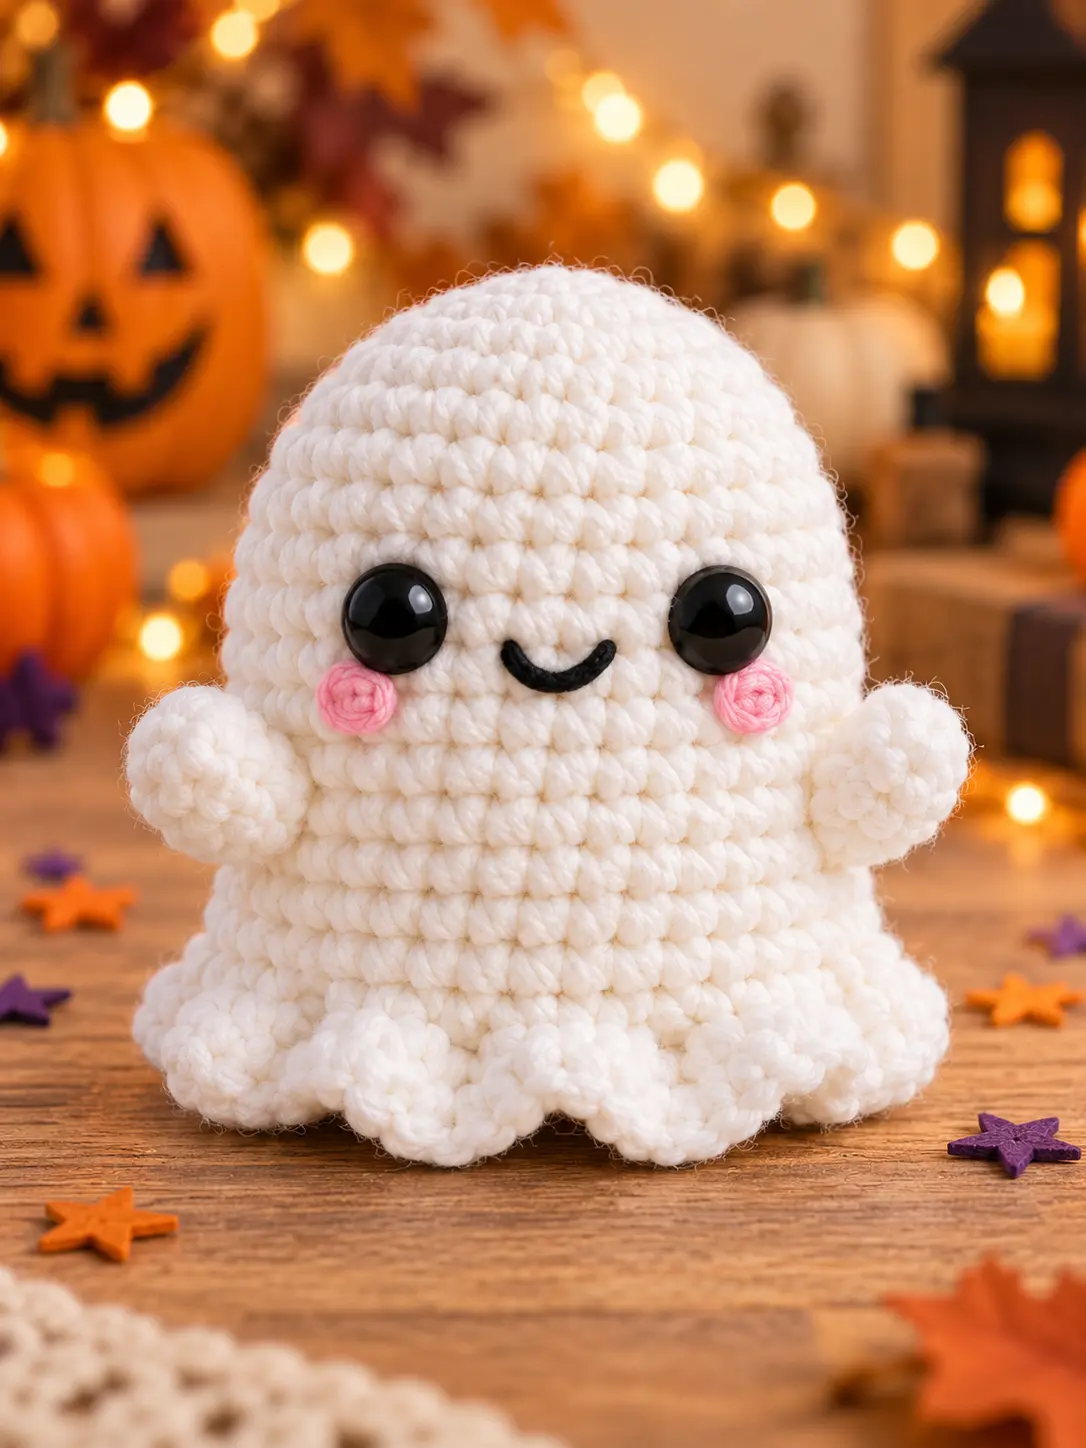
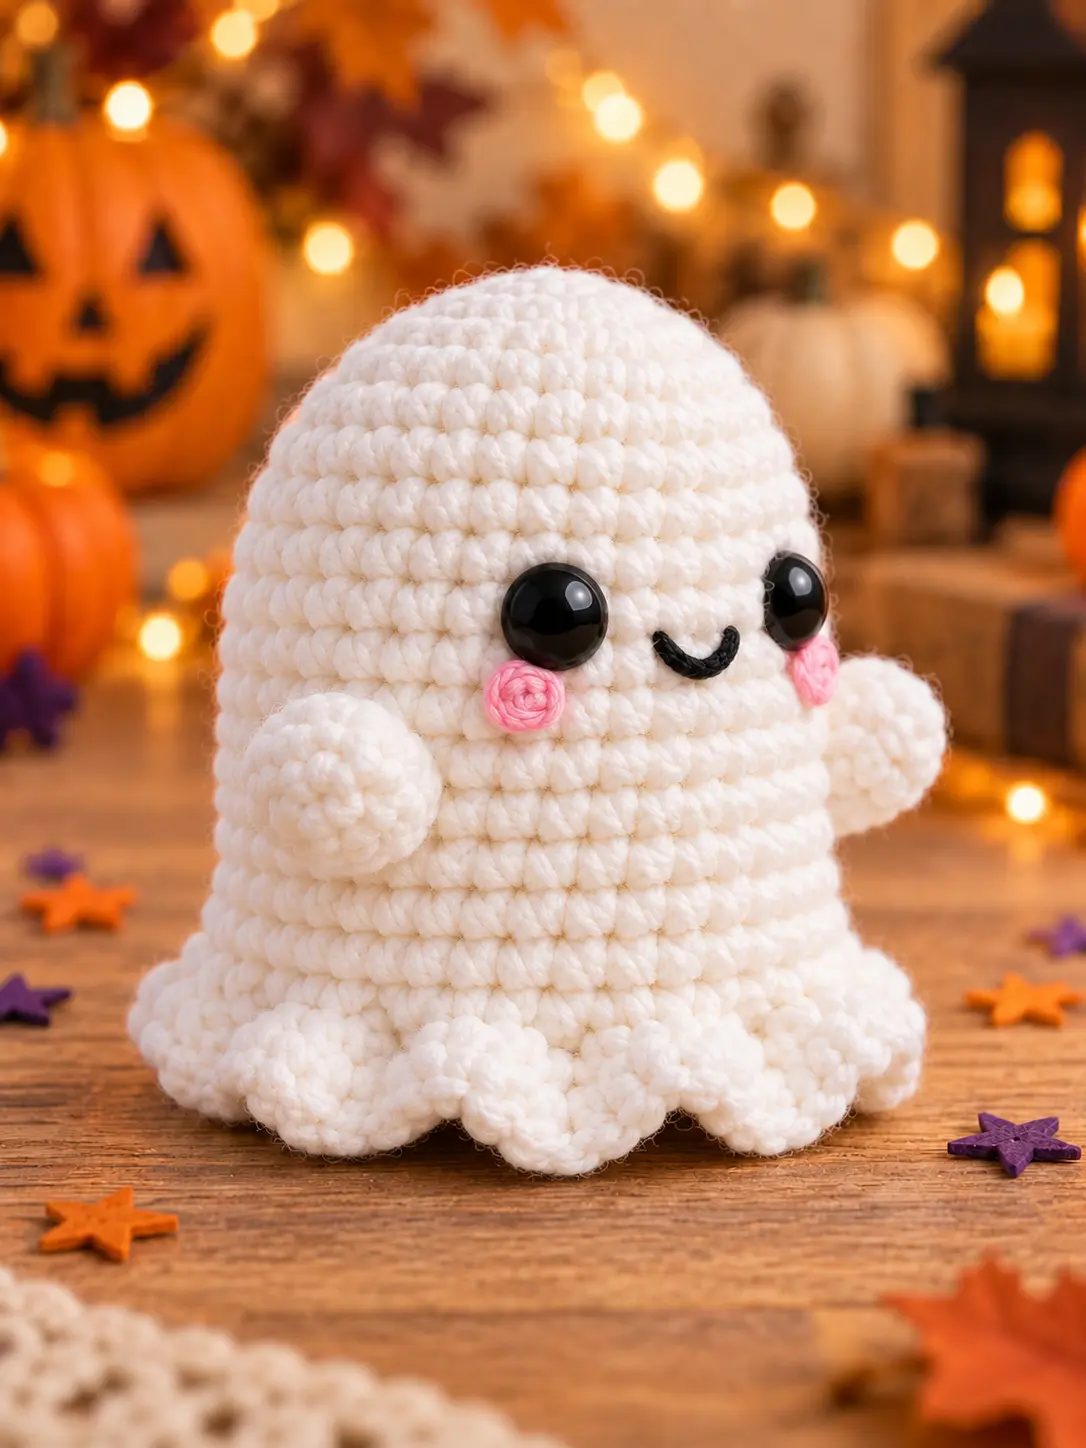
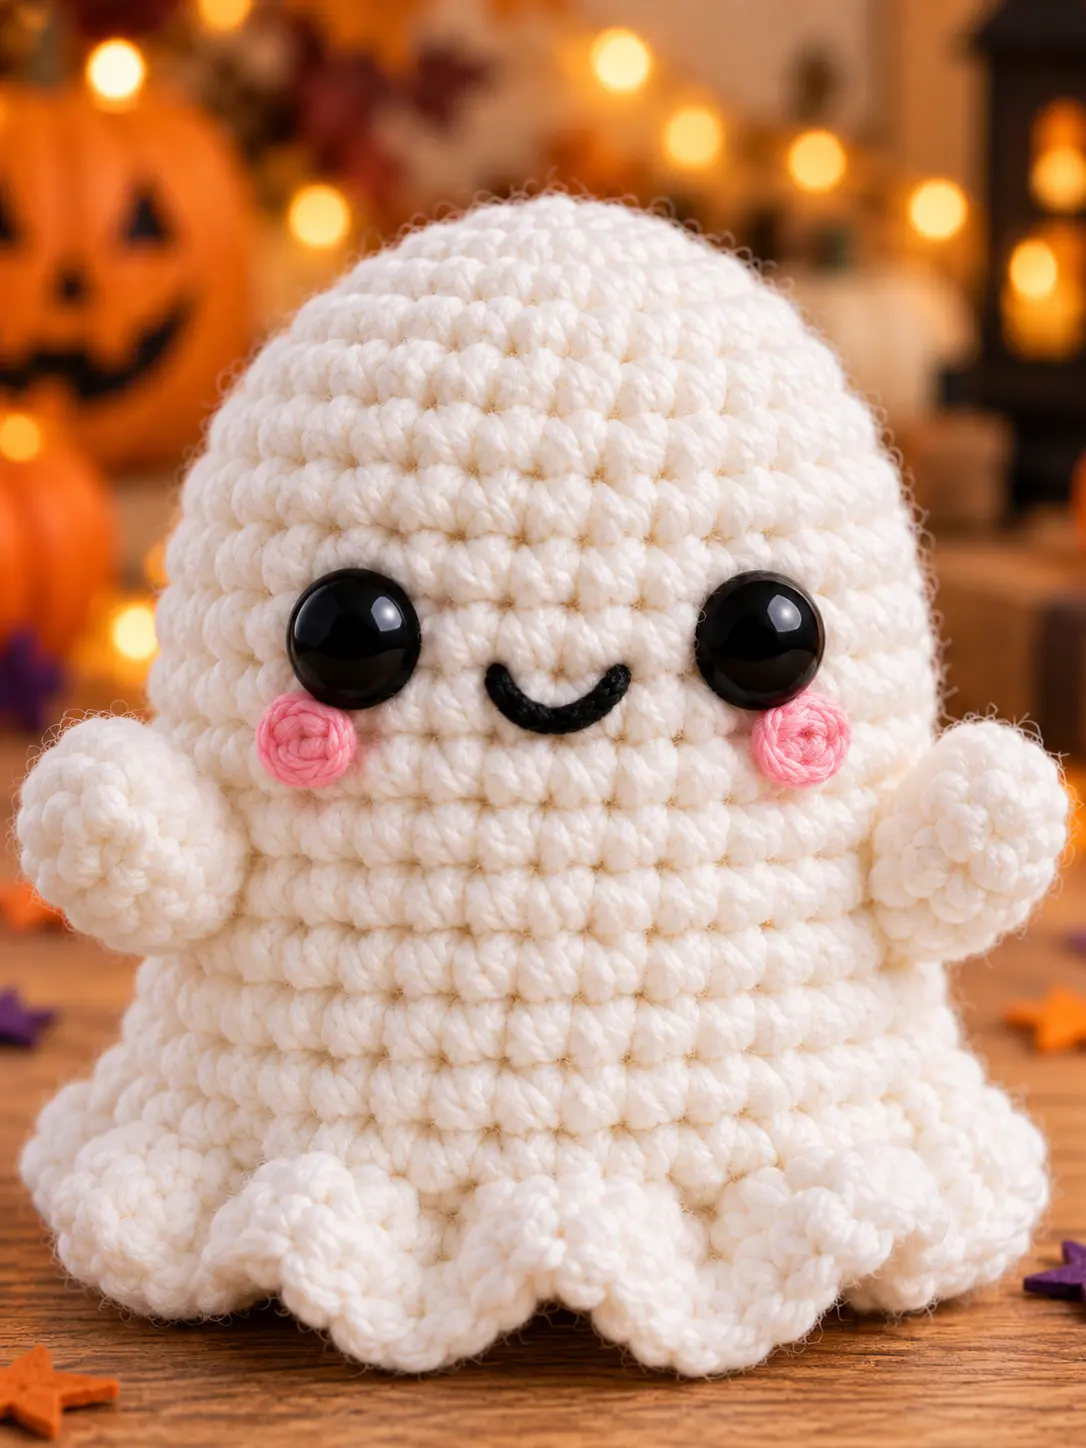
Mallow is a small crochet ghost with a round head, a soft plump body, two tiny waving arms, and six puffy points around the bottom. His shiny black eyes, little curved smile, and spiral pink cheeks give him a friendly face that feels playful instead of scary.
This free Halloween amigurumi pattern is made with simple stitches and only three yarn colors. The head and body are crocheted as one piece, so there is no neck seam. The arms and cheek circles are the only pieces that need sewing. A separate edging is worked into unused front loops to create the six even ghost points shown in the photos.
The instructions below were rebuilt to match the finished crochet design. The original graphic does not use all the saved loops correctly, so the bottom edging has been corrected. Every increase, decrease, closing round, and edging repeat has been counted.
About This Little Ghost Crochet Pattern
Mallow is a quick seasonal project for an adventurous beginner. The main body uses single crochet, increases, and invisible decreases. The bottom points add half double crochet, double crochet, and treble crochet, but the same short sequence is repeated six times.
You can place the finished ghost on a shelf, desk, mantel, Halloween table, or small autumn display. It also makes a sweet handmade gift. Because it is small and uses little yarn, it is a useful project for leftover white and pink yarn.
Skill Level
Easy to confident beginner. You should know how to make a magic ring, crochet in continuous rounds, increase, decrease, work in the back loop only, and sew small amigurumi pieces together.
Finished Size
Approximately 10 cm (4 inches) tall when made with DK or light worsted yarn and a 2.5 mm hook. The finished size may change with your yarn thickness, hook size, tension, and amount of stuffing.
Materials
- White DK or light worsted yarn for the body and arms
- Small amount of pink yarn for the cheeks
- Black embroidery thread or thin black yarn for the smile
- Two 10 mm black safety eyes
- 2.5 mm crochet hook
- Polyester fiberfill
- Yarn needle
- Stitch marker
- Scissors
- Sewing pins, optional
Abbreviations
This pattern uses US crochet terms.
- BLO: back loop only
- ch: chain
- dc: double crochet
- dec: invisible single crochet decrease
- FLO: front loop only
- FO: fasten off
- hdc: half double crochet
- inc: 2 single crochet stitches in one stitch
- MR: magic ring
- rnd: round
- sc: single crochet
- sl st: slip stitch
- st/sts: stitch/stitches
- tr: treble crochet
Pattern Notes
- Work the body and arms in continuous spiral rounds. Do not join unless the instructions say to join.
- Place a stitch marker in the first stitch of every round.
- The number in parentheses at the end of each round is the total number of stitches.
- Repeat the instructions inside parentheses the stated number of times.
- Use invisible decreases so the lower body stays smooth and the stuffing does not show.
- Keep your stitches firm. If there are large spaces between them, use a smaller hook.
- Stuff with several small pieces of fiberfill instead of one large piece.
How to Make an Invisible Decrease
Insert the hook into the front loop of the next stitch. Without making a stitch, insert the hook into the front loop of the following stitch. Yarn over and pull through the first two loops. Yarn over again and pull through the remaining two loops. Two stitches have become one neat single crochet.
1. Head and Body
Use white yarn. Begin at the rounded top of the ghost.
- Rnd 1: 6 sc in MR. (6)
- Rnd 2: Inc in every st around. (12)
- Rnd 3: (1 sc, inc) × 6. (18)
- Rnd 4: (2 sc, inc) × 6. (24)
- Rnd 5: (3 sc, inc) × 6. (30)
- Rnds 6–12: Sc around. (30)
Place the safety eyes between Rounds 8 and 9 with 7 visible stitches between them. Push the posts through the crochet fabric, check the face from the front, and then attach the safety backs.
The small smile will be embroidered between the eyes after the body is closed. Make sure there is enough open space beneath the eyes for the smile and pink cheeks.
- Rnd 13: Working in BLO, (3 sc, dec) × 6. (24)
- Rnd 14: (2 sc, dec) × 6. (18)
- Rnd 15: (1 sc, dec) × 6. (12)
Begin stuffing. Fill the rounded top first, then add stuffing to the sides and center. The body should feel firm but should not stretch the stitches. Keep the bottom slightly flatter so the ghost can stand.
- Rnd 16: Dec around. (6)
Finish stuffing through the small opening. FO and leave a tail. Thread the tail through the front loops of the final six stitches, pull firmly to close, secure the yarn, and hide the end inside the body.
2. Six-Point Ghost Bottom
Round 13 was worked through the back loops of 30 stitches. This left 30 unused front loops around the outside of the body. The edging below uses exactly five loops for each point. Six repeats use all 30 loops and create the six puffy scallops shown in the photos.
Hold the ghost upside down. Join white yarn with a sl st in any unused front loop from Round 13.
Repeat the following sequence six times:
- Sl st in the next unused loop.
- Make 1 sc in the next loop.
- Work (1 hdc, 1 dc, 1 tr, 1 dc, 1 hdc) in the next loop.
- Make 1 sc in the next loop.
- Sl st in the next loop.
After the sixth repeat, join to the first sl st. FO and weave in both yarn ends. Use your fingers to spread the six points evenly around the base.
3. Rounded Arms — Make 2
Use white yarn. Each arm starts at the rounded hand and narrows slightly at the body.
- Rnd 1: 6 sc in MR. (6)
- Rnd 2: Inc around. (12)
- Rnds 3–4: Sc around. (12)
- Rnd 5: (1 sc, dec) × 4. (8)
Add a very small amount of stuffing to the rounded end. Leave the open end almost empty so it can lie flat against the body.
Flatten the opening and make 4 sc through both layers. FO and leave a long yarn tail for sewing.
4. Spiral Pink Cheeks — Make 2
Use pink yarn.
- Rnd 1: Make 6 sc in MR. (6)
Join to the first stitch with a sl st. Pull the magic ring closed, but do not flatten the stitches too much. FO and leave a sewing tail. The small circle naturally looks like a soft spiral when it is attached.
5. Embroidered Smile
Thread a yarn needle with black embroidery thread or thin black yarn. Make a short curved smile centered between the eyes, about one round below them.
A simple way to keep the curve neat is to make one straight stitch from one side of the mouth to the other. Add a tiny holding stitch at the middle and pull it gently downward. Do not pull tightly or the face will sink inward.
Assembly
- Pin one arm to each side of the body between Rounds 10 and 12.
- Angle both rounded hands slightly upward to create the friendly waving pose.
- Check the ghost from the front and make sure the arms are at the same height.
- Sew through the flat four-stitch edge of each arm and the body fabric. Go across the edge twice for a firm join.
- Place one pink cheek below and slightly outside each eye.
- Sew around the center of each cheek with small pink stitches.
- Add the small black embroidered smile between the cheeks.
- Hide all yarn ends inside the body or arms.
- Arrange the six bottom points evenly and press the center of the base upward very gently so Mallow stands flat.
Stitch-Count Check
The body grows in even six-stitch steps: 6, 12, 18, 24, and 30. After seven straight rounds, it decreases from 30 to 24, 18, 12, and 6. Every decrease round has a complete repeat and the final opening closes correctly.
Round 13 is worked through the back loops of all 30 body stitches before the decreases are completed. This leaves 30 front loops for the bottom. Each scallop uses five loops, and six scallops use 30 loops exactly. Each arm grows from 6 to 12, stays at 12, decreases to 8, and closes with four stitches through two flat layers.
Helpful Tips for the Best Shape
Count Every Round
A missed increase can make the top lean, and a missed decrease can move the closing point away from the center. Count before starting each new round.
Do Not Overstuff the Base
Too much stuffing in the final rounds can push the center downward and make the ghost wobble. Keep the top and middle firm, but use a little less stuffing near the last two rounds.
Shape the Top With Small Pieces of Stuffing
Push a few tiny pieces of stuffing into the top before closing. This fills the center of the magic ring and helps the dome stay smooth and rounded.
Pin the Arms Before Sewing
The arm angle gives Mallow his friendly pose. Pin both arms, place the ghost on a flat surface, and check the position before making permanent stitches.
Keep the Face Low and Centered
The large blank area above the eyes creates the sweet rounded-head look. Place the eyes at the recommended rounds and keep the smile small.
Ways to Customize Your Ghost
- Use pale lavender, mint, peach, or light gray instead of white.
- Replace the pink cheeks with purple, orange, or red yarn.
- Add a tiny bow to one arm.
- Make a hanging loop at the top for a Halloween ornament.
- Use thinner yarn and a smaller hook for a keychain-sized ghost.
- Use blanket yarn and a larger hook for a soft plush version.
- Embroider sleepy closed eyes for a different expression.
Frequently Asked Questions
Is this pattern beginner friendly?
Yes. The main body and arms use basic amigurumi stitches. The bottom points include taller stitches, but the same five-loop sequence is repeated six times.
Why does my ghost have fewer than six points?
Check that Round 13 left 30 unused front loops. Each point must use five loops. If one repeat uses an extra loop, there will not be enough loops for the sixth point.
Why is my ghost wider or taller?
Yarn weight, hook size, and personal tension change the finished measurement. A looser stitch makes a larger ghost. The proportions will still work when all pieces use the same yarn and hook.
Can I make the arms without stuffing?
Yes. Unstuffed arms will look flatter and softer. For the rounded look in the photos, add only a small pinch of fiberfill to each hand.
Can I embroider the eyes?
Yes. Embroidered eyes are a good choice when the ghost will be handled by a young child. Use several secure black satin stitches and hide the yarn ends inside the body.
How can I make the ghost stand evenly?
Do not overstuff the bottom. After closing the body, gently push the center of the base upward and arrange all six scallops so they touch the table evenly.
Care and Safety
Mallow is designed as a small decorative Halloween collectible. Plastic safety eyes and sewn pieces may become choking hazards. Keep the finished ghost away from children under three and pets, or replace the safety eyes with secure embroidery.
Spot-clean with cool water and mild soap. Press out extra water with a towel and let the ghost dry flat. Reshape the arms and bottom points while the yarn is still damp. Keep all yarn decorations away from candles, heaters, hot bulbs, and open flames.
Your Little Ghost Buddy Is Finished
Give the rounded top one final shape with your hands, lift both arms into their friendly waving position, and spread the six soft points around the base. Mallow is ready to bring a small handmade smile to your Halloween decorations.
SEO Details
SEO title: Mallow Little Ghost Buddy Free Crochet Pattern
Meta description: Crochet Mallow, a friendly little ghost with raised arms, pink cheeks, a round body, and six soft points. Includes a complete free Halloween pattern.
Suggested URL slug: mallow-little-ghost-buddy-free-crochet-pattern
Main keyword: little ghost crochet pattern
Related keywords: Halloween ghost amigurumi, easy ghost crochet pattern, mini ghost amigurumi, free Halloween crochet pattern