15 Easy DIY Garden Edging Ideas on a Budget
The grass kept creeping into my flower beds, the soil spilled over after every rain, and nothing looked clearly defined. I grabbed whatever I could find—old bricks, leftover wood, even a few random stones—and started outlining the edges just to see if it would help. Within an hour, the whole space felt more organized, like it finally knew where everything belonged. That simple change made me realize how powerful edging can be, even when you’re working with almost nothing.
As I kept experimenting, I noticed that the best results didn’t come from expensive materials but from creativity and placement. Edging isn’t just about creating a boundary—it’s about adding structure, guiding the eye, and giving your garden a finished look. Some of the ideas that worked best for me were the ones I didn’t overthink, the ones that felt a little improvised but still intentional. It’s funny how something so small can shift the entire feel of a space. And honestly, that’s what makes DIY edging so satisfying.
Now, I see garden edging as one of the easiest ways to upgrade a yard without spending much at all. You can work with what you have, mix materials, and adjust as you go until it feels right. If your garden has ever looked a bit undefined or scattered, adding a simple edge can change everything. These ideas are all about keeping things affordable, creative, and easy to try. Let’s get into some budget-friendly edging ideas that actually look amazing.
1. Simple Brick Border
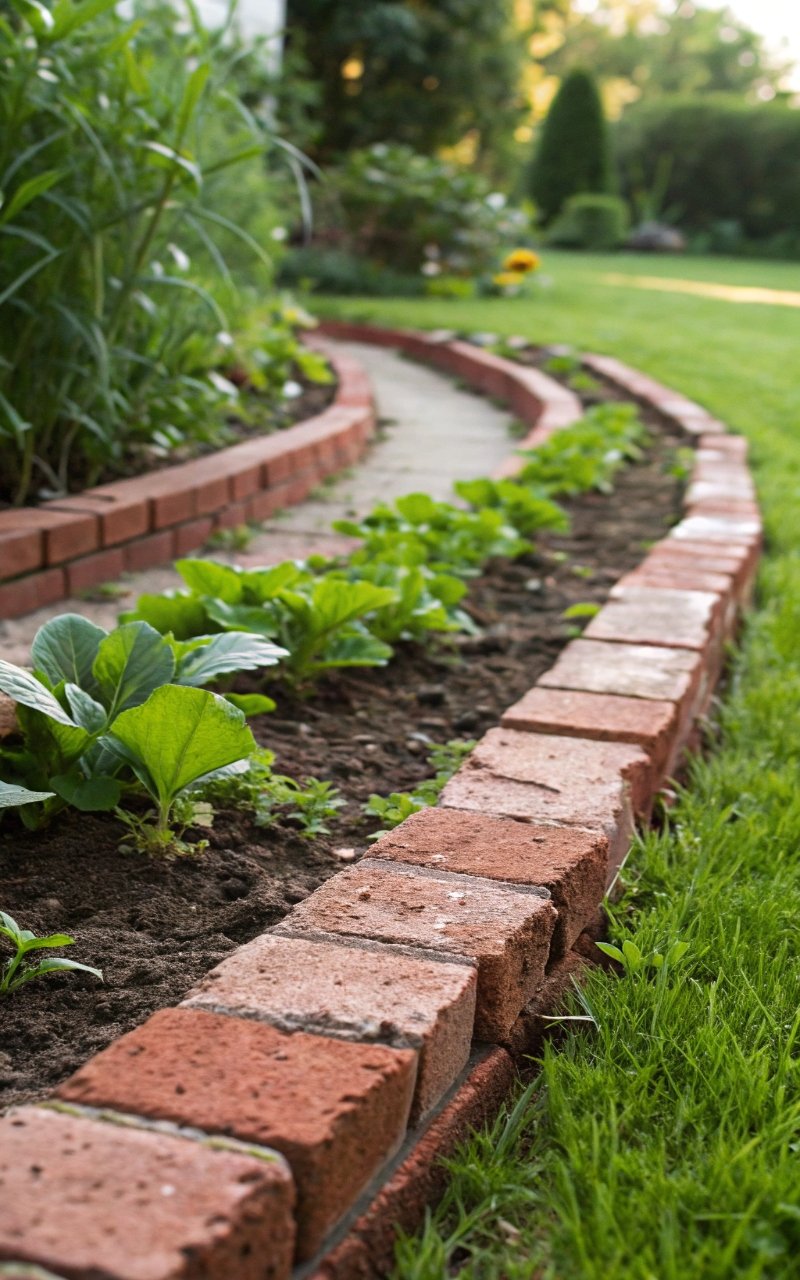
I lined up a row of leftover bricks along my garden bed, and the difference felt immediate, like everything suddenly had a clean, grounded edge. The rich tones of the bricks added warmth, while the straight line created a sense of order that the space was missing before. You can lay them flat for a classic look or angle them slightly for a bit more character. It’s one of those ideas that looks intentional even if the placement isn’t perfect. Isn’t it interesting how something so basic can feel so polished? Pro Tip: Dig a shallow trench so the bricks sit securely and stay in place.
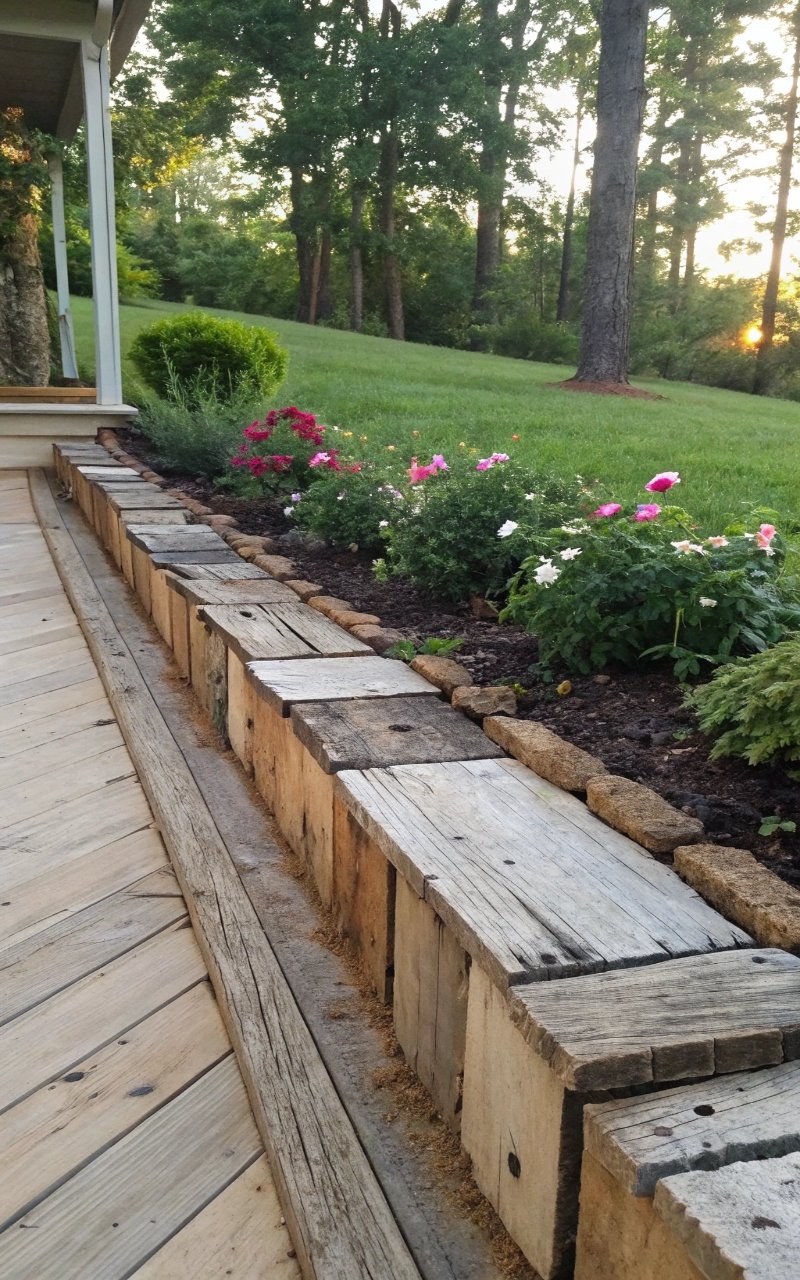
2. Wooden Plank Edging
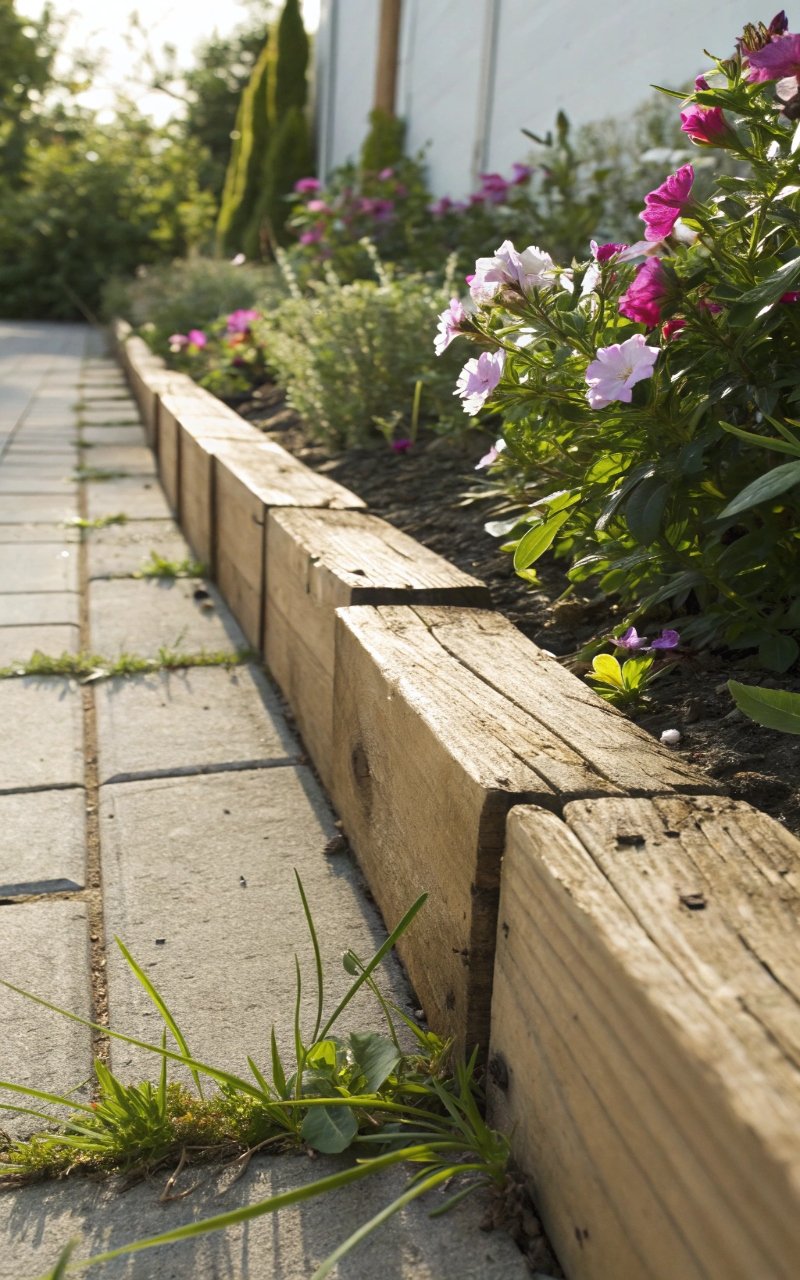
Using leftover wooden planks gave my garden a soft, rustic boundary that blends beautifully with greenery. The natural texture adds warmth while still defining the space clearly. Each piece has its own imperfections, which makes the whole design feel more relaxed and organic. It’s simple, but it brings a cozy vibe to the yard. It’s such an easy way to use materials you already have. Pro Tip: Seal the wood to protect it from moisture and extend its life.
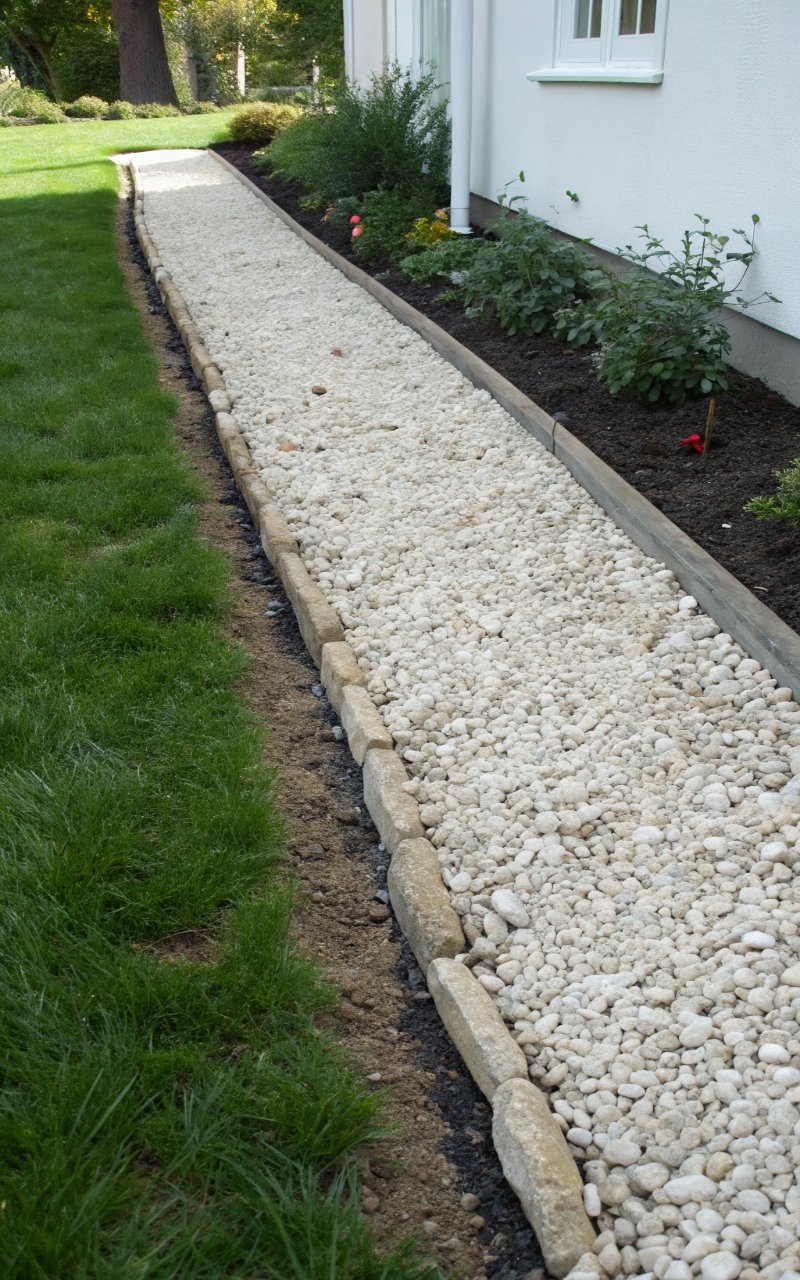
3. Stone Border with Mixed Sizes
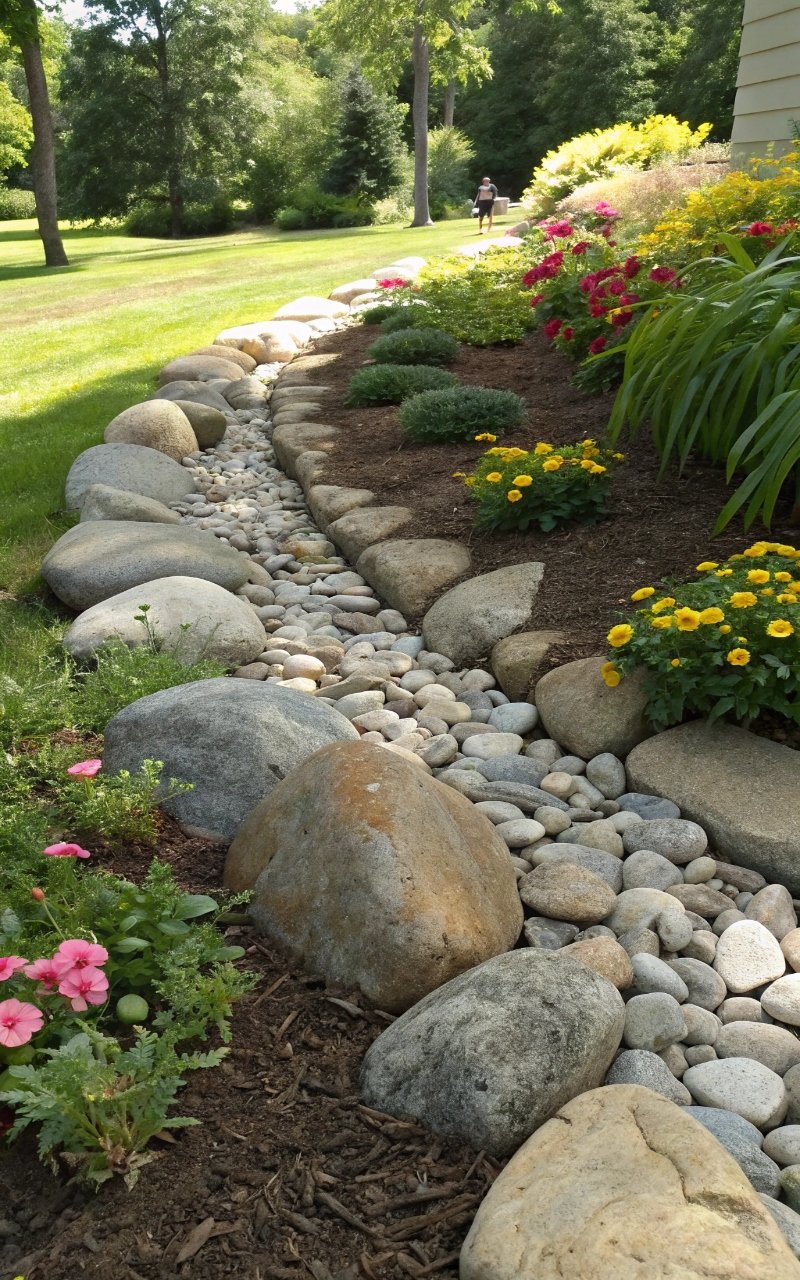
I gathered stones from different spots and arranged them along the edge, and the uneven shapes created a natural flow that felt effortless. The mix of sizes added depth and texture, making the border look more layered and interesting. It doesn’t follow a strict line, which gives it a softer, more organic feel. It’s like letting nature guide the design. It’s simple, but it looks intentional. Pro Tip: Place larger stones first for stability, then fill gaps with smaller ones.
4. Bottle Edging for a Creative Touch
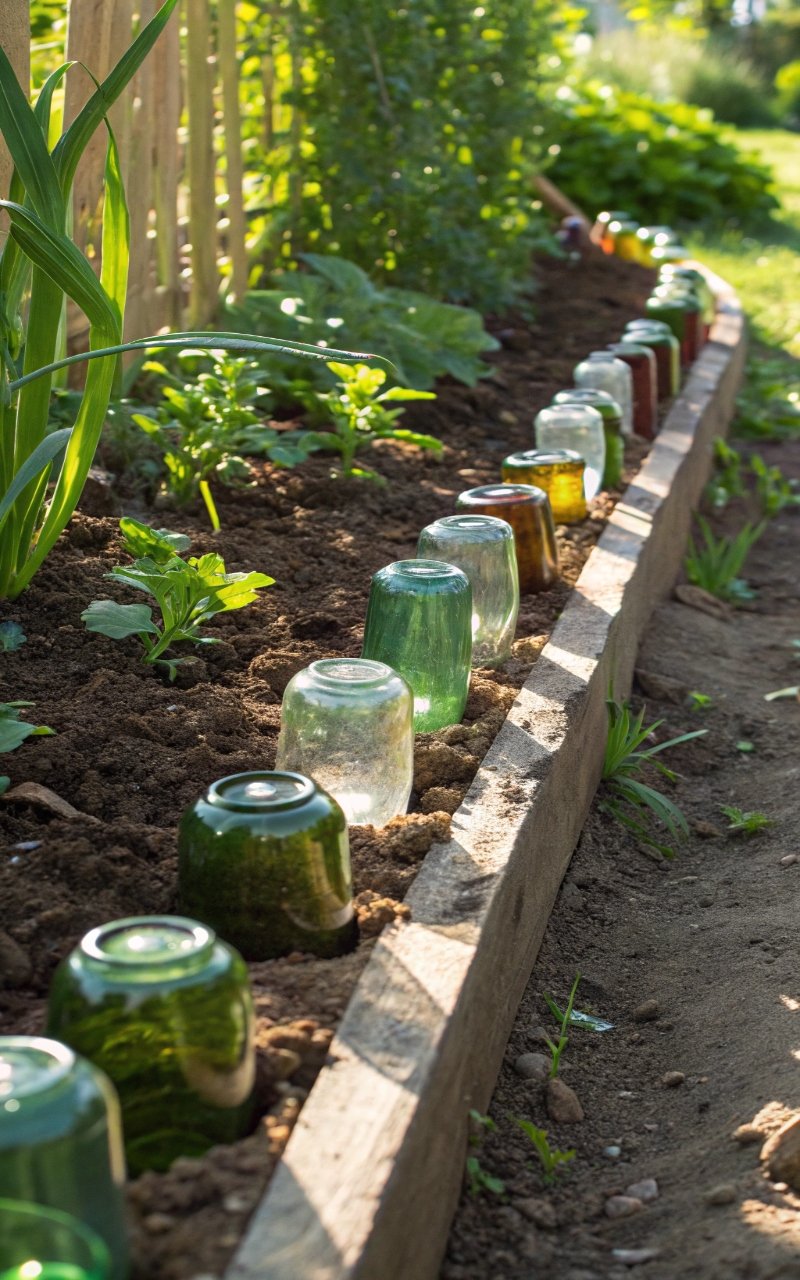
I tried using glass bottles turned upside down along a garden edge, and it instantly added a playful, colorful detail. The way sunlight hits the glass creates little reflections that make the border stand out. It’s a creative way to reuse items that would otherwise go to waste. It feels a bit quirky, but in a really fun way. Honestly, it’s such a conversation starter. Pro Tip: Use bottles of similar size for a more even look.
5. Gravel Trench Edging
Digging a narrow trench and filling it with gravel created a clean, subtle boundary that keeps soil in place. The contrast between gravel and soil makes the edge easy to see without adding bulk. It also helps with drainage, which is a nice bonus. The crunch underfoot adds a sensory detail that makes the garden feel more interactive. It’s low-key but effective. Pro Tip: Add landscape fabric underneath to prevent weeds.
6. Bamboo Stick Edging
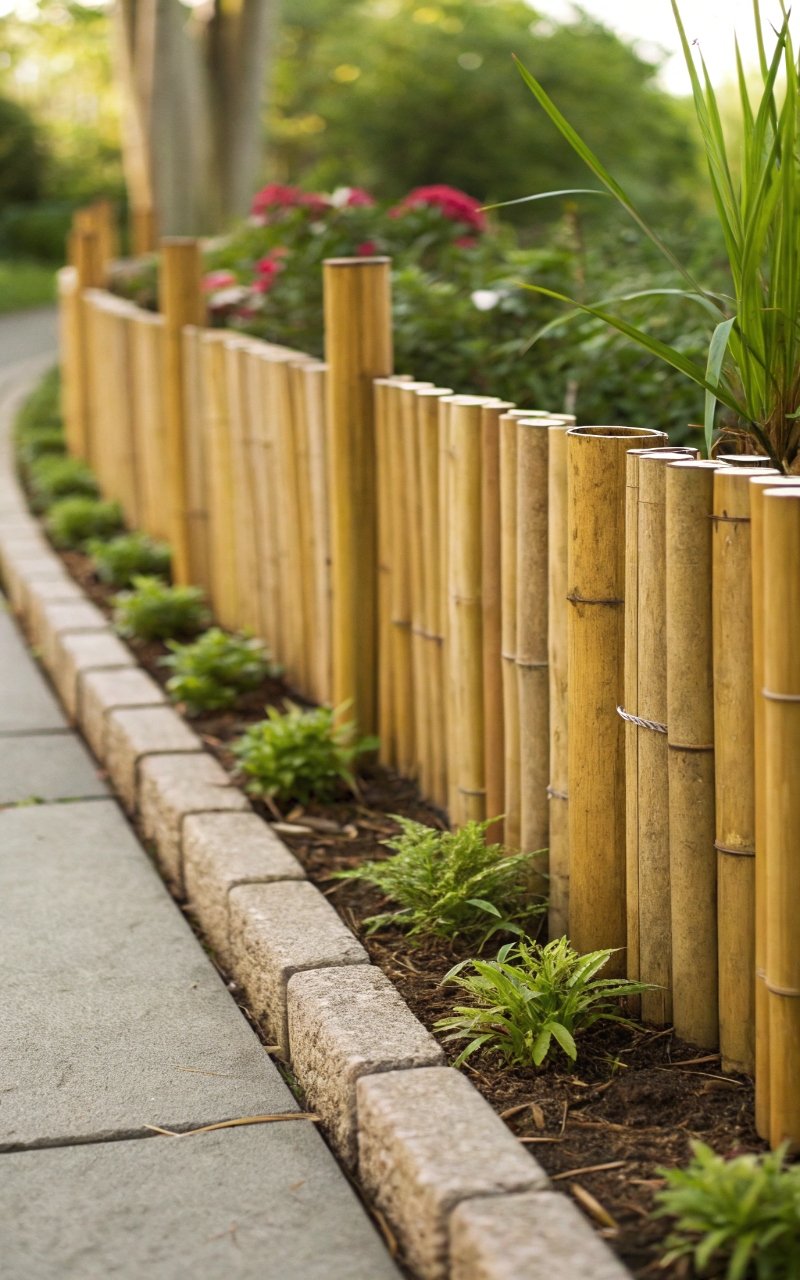
I lined up bamboo sticks along the edge, and it gave the garden a calm, natural look that feels light and balanced. The vertical lines create a gentle rhythm that draws your eye without overwhelming the space. It’s an affordable option that still looks stylish. The texture blends beautifully with plants. It’s simple, but it hits different. Pro Tip: Tie sticks together for added stability.
7. Recycled Pallet Wood Border
Breaking down an old pallet turned into one of the most satisfying DIY projects because it felt like turning scrap into something useful. The wood pieces created a charming border that feels both rustic and creative. Each plank adds character, making the design feel unique. It’s budget-friendly and surprisingly durable. It’s a great way to reuse materials. Pro Tip: Sand rough edges to avoid splinters.
8. Concrete Block Edging
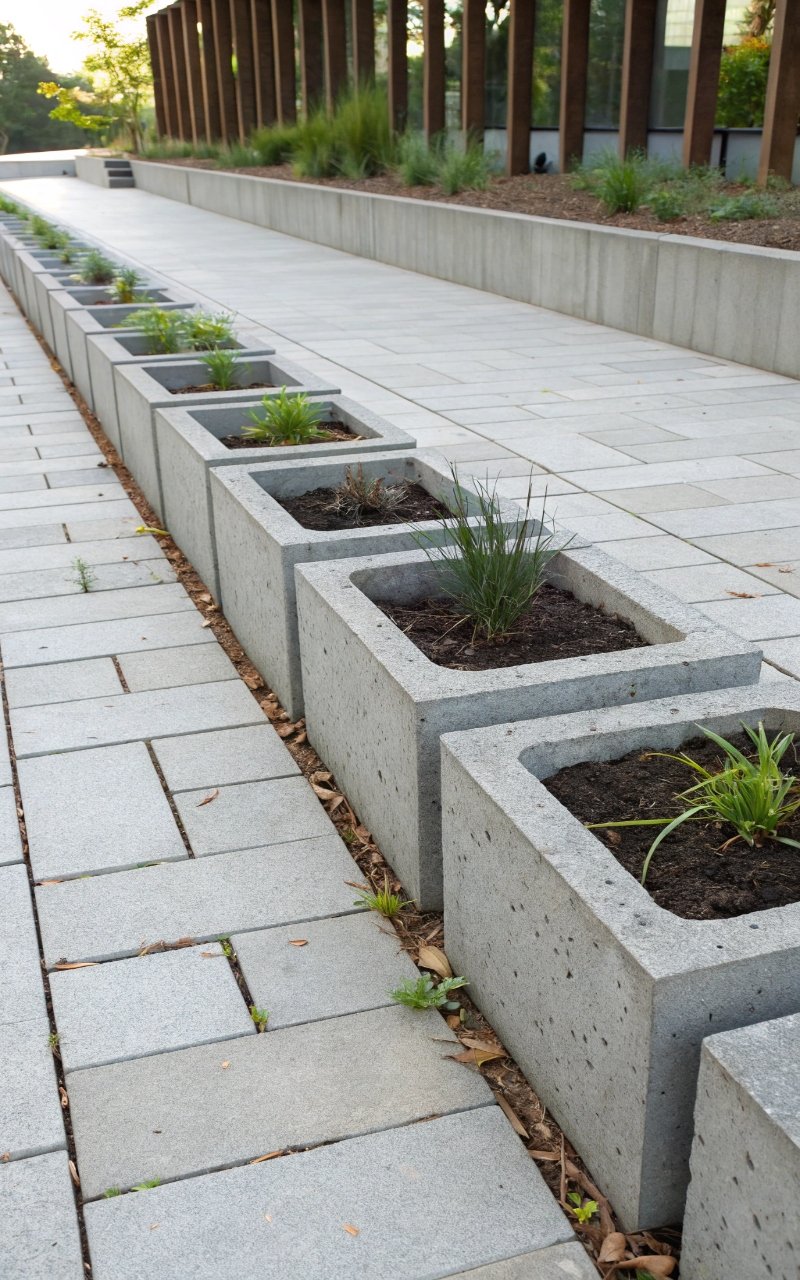
I used a few leftover concrete blocks, and they created a clean, modern edge that contrasts nicely with plants. The hollow centers can even be used as mini planters, which adds an extra layer of design. It’s functional and stylish at the same time. The structure feels solid and reliable. Who knew something so basic could look this good? Pro Tip: Paint the blocks for a more customized look.
9. Rope and Stake Border
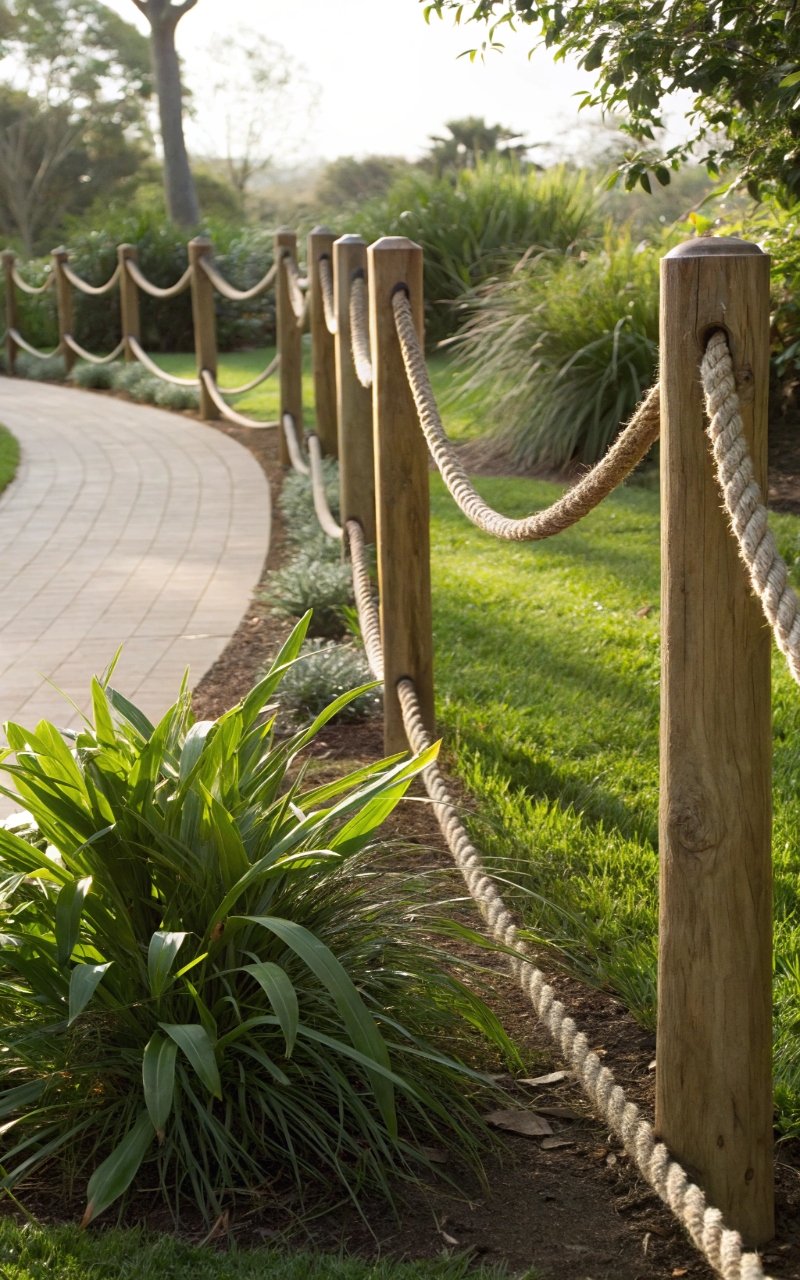
I tried a rope border with small stakes, and it gave the garden a relaxed, slightly coastal vibe that feels inviting. The rope creates a soft boundary instead of a rigid one. It’s perfect if you want something subtle but still defined. The texture adds interest without overpowering the space. It’s unexpected in a good way. Pro Tip: Use weather-resistant rope to prevent wear.
10. Metal Strip Edging

Thin metal strips create a sleek, modern edge that keeps everything looking clean and sharp. I loved how subtle it looked while still doing its job perfectly. It separates areas without drawing too much attention. The simplicity makes it feel polished. It’s minimal but effective. Pro Tip: Install slightly below ground level for a seamless finish.
11. Terracotta Pot Edging

I lined up small terracotta pots along the edge, and it created a warm, layered look that feels full of character. Some were upright, others tilted, which added a playful detail. The earthy tones pair beautifully with greenery. It’s decorative and functional at the same time. It’s such a charming idea. Pro Tip: Use different pot sizes for variety.
12. Log Slice Edging
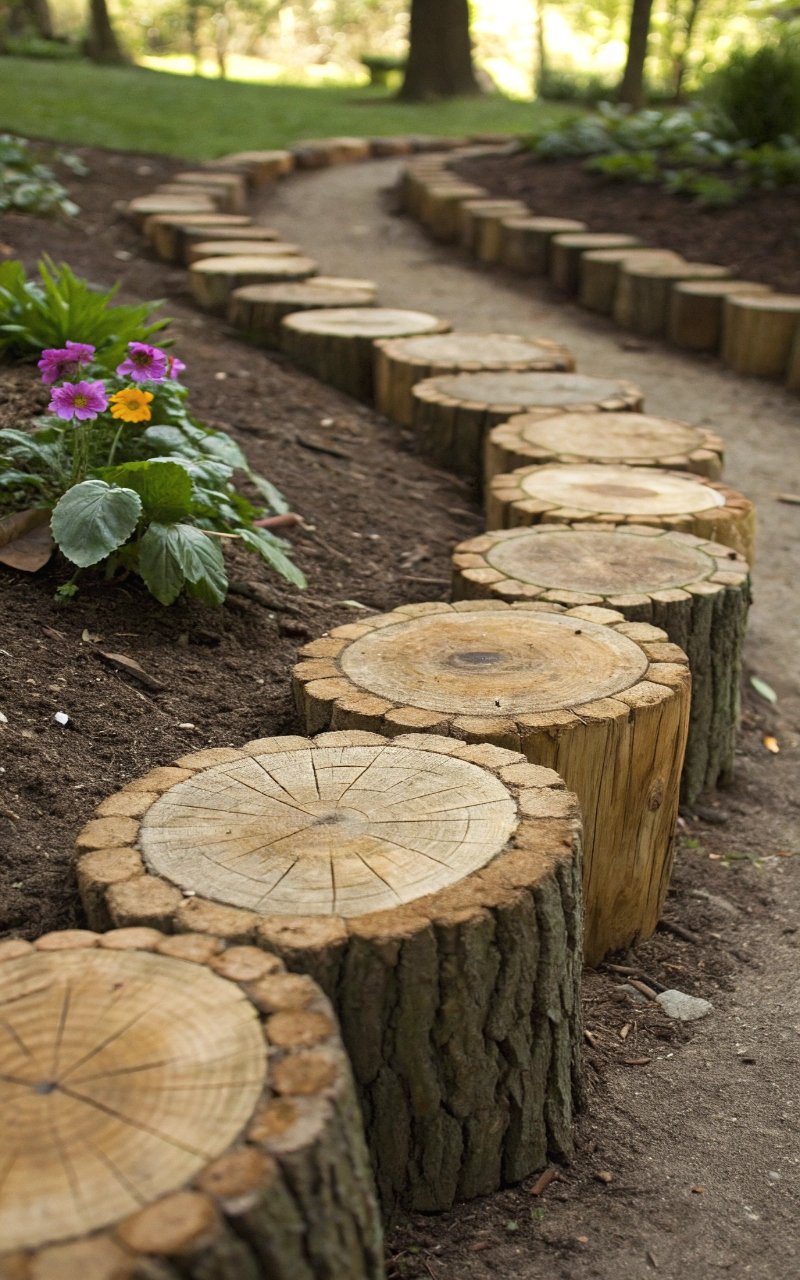
Cutting logs into slices and placing them vertically gave the garden a woodland feel that’s both cozy and natural. The rings in the wood add visual detail that feels organic. Each piece is slightly different, which makes the border more interesting. It’s simple, but it creates a strong visual impact. It feels grounded and warm. Pro Tip: Treat the wood to prevent rot.
13. Tile Scrap Border
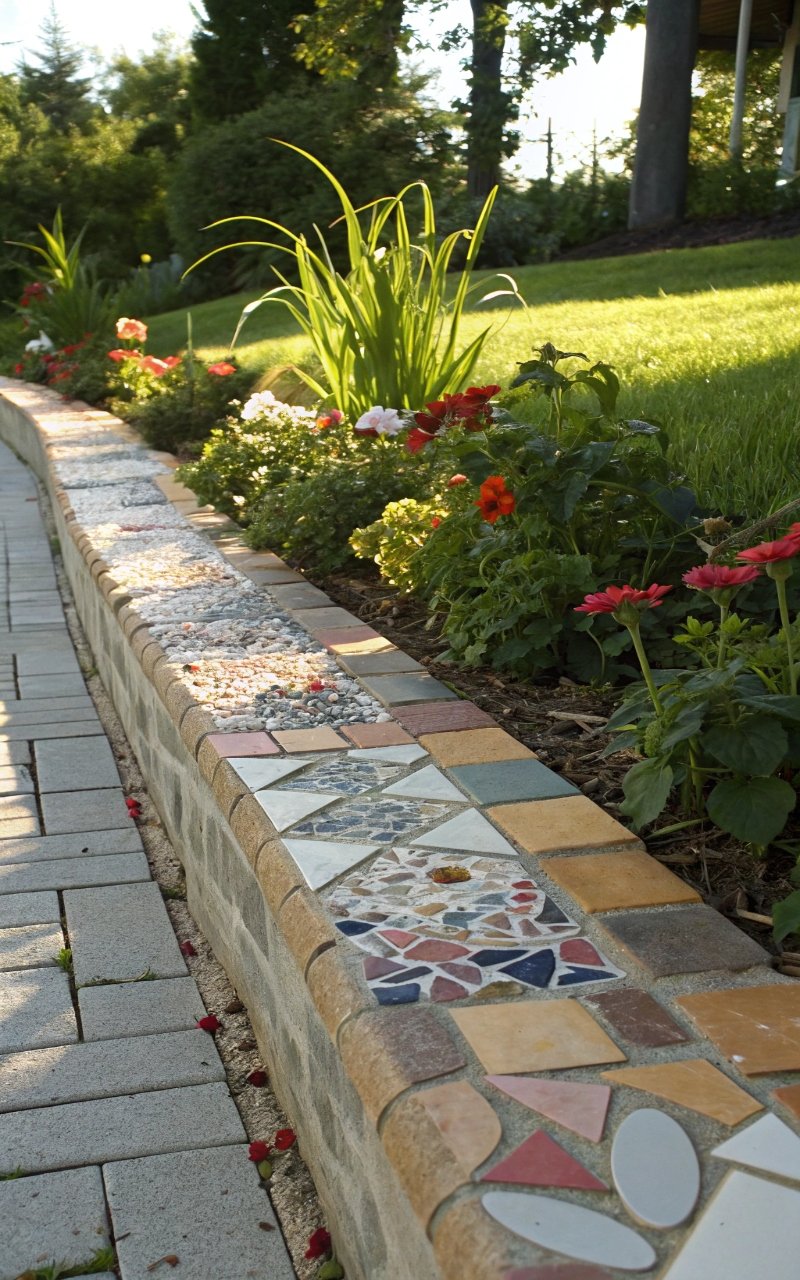
Using leftover tiles created a mosaic-style edge that feels artistic and unique. The mix of colors and patterns adds personality to the garden. It’s a great way to reuse materials creatively. The reflective surfaces catch light in subtle ways. It’s playful but still polished. Pro Tip: Set tiles in mortar for durability.
14. Plastic Edging for Quick Fix
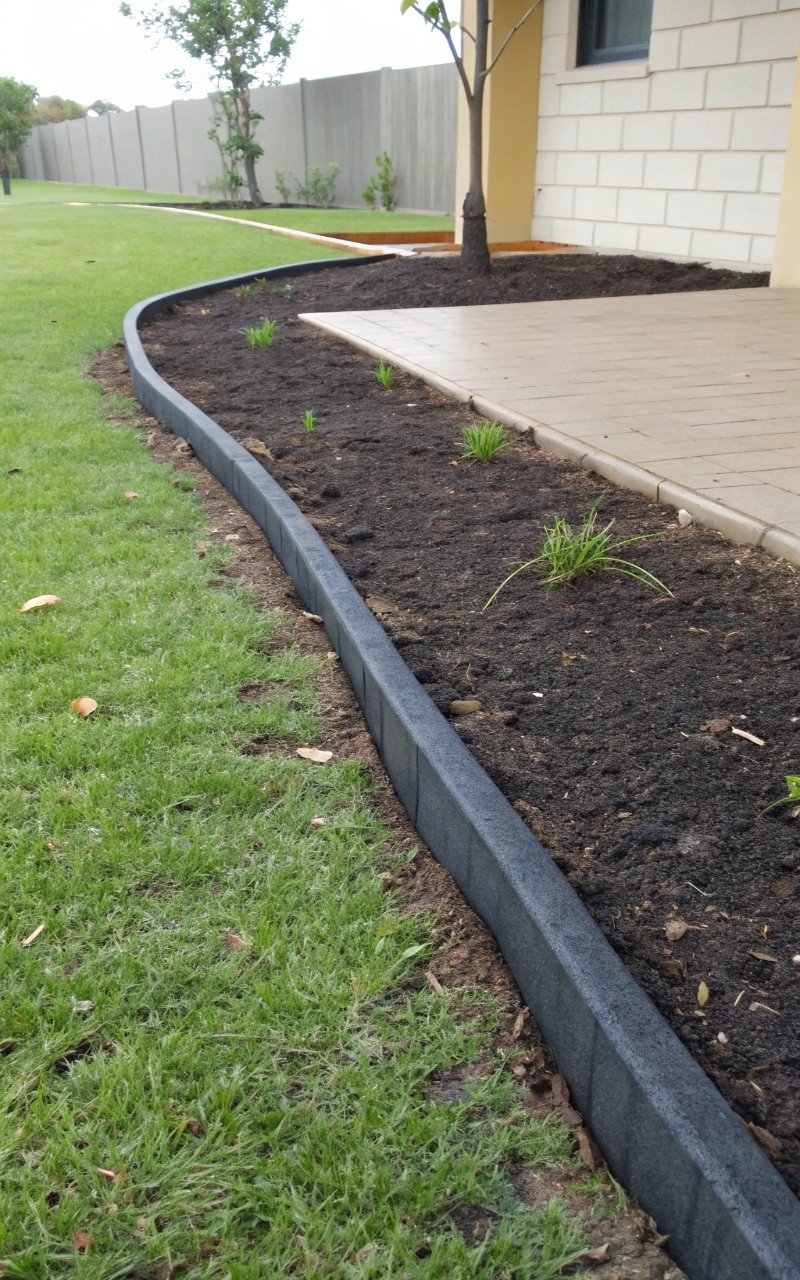
Plastic edging might be simple, but it’s one of the easiest ways to create a clean boundary quickly. I used it as a base and added other materials around it for a more finished look. It keeps everything in place without much effort. It’s practical and reliable. Sometimes simple is all you need. Pro Tip: Choose darker shades to blend with soil.
15. Living Plant Edging
Planting low-growing greenery along the edge created a soft, natural boundary that feels alive and ever-changing. The plants fill in over time, making the border look fuller and more integrated. It’s both decorative and functional. The growth adds a dynamic element you don’t get with hard materials. It’s such a satisfying option. Pro Tip: Trim regularly to maintain a clean edge.
Conclusion
Garden edging doesn’t have to be expensive or complicated to make a real impact, and that’s what makes these ideas so appealing. With a bit of creativity and a willingness to use what you already have, you can completely change how your garden looks and feels. Each of these options offers a different style, but they all share one thing in common—they bring structure and intention to your space. That shift alone can make your yard feel more put together.
What makes DIY edging so rewarding is how flexible it is, allowing you to experiment and adjust as your garden evolves. You can mix materials, try new layouts, and refine your design over time without feeling locked into one choice. It’s a process that grows with your space. That freedom makes it both practical and enjoyable.
As you start adding edges to your garden, you’ll notice how everything begins to feel more defined and cohesive. The plants stand out more, the layout feels clearer, and the whole space becomes easier to maintain. Take your time, trust your instincts, and enjoy the process. In the end, it’s those simple, thoughtful details that make your garden truly stand out.